
Giving your visitors a consistent user experience on your website is vital. Take full control of the popup by opting for a Custom HTML popup. Here’s how to set it up.
Why use this addon?
Giving your visitors a consistent user experience on your website is vital. All of the widgets are customizable in their appearances, but if you’d like to take it one step ahead and create your own popup, custom HTML popup is the way to go.
The widget template comes with a blank popup/action button box in which you can add any HTML / CSS/ scripts of your choice.
How to activate and configure it?
The Custom HTML feature is included in all premium packages. Activate any of the packages to enable this feature. Here’s how to set it up:
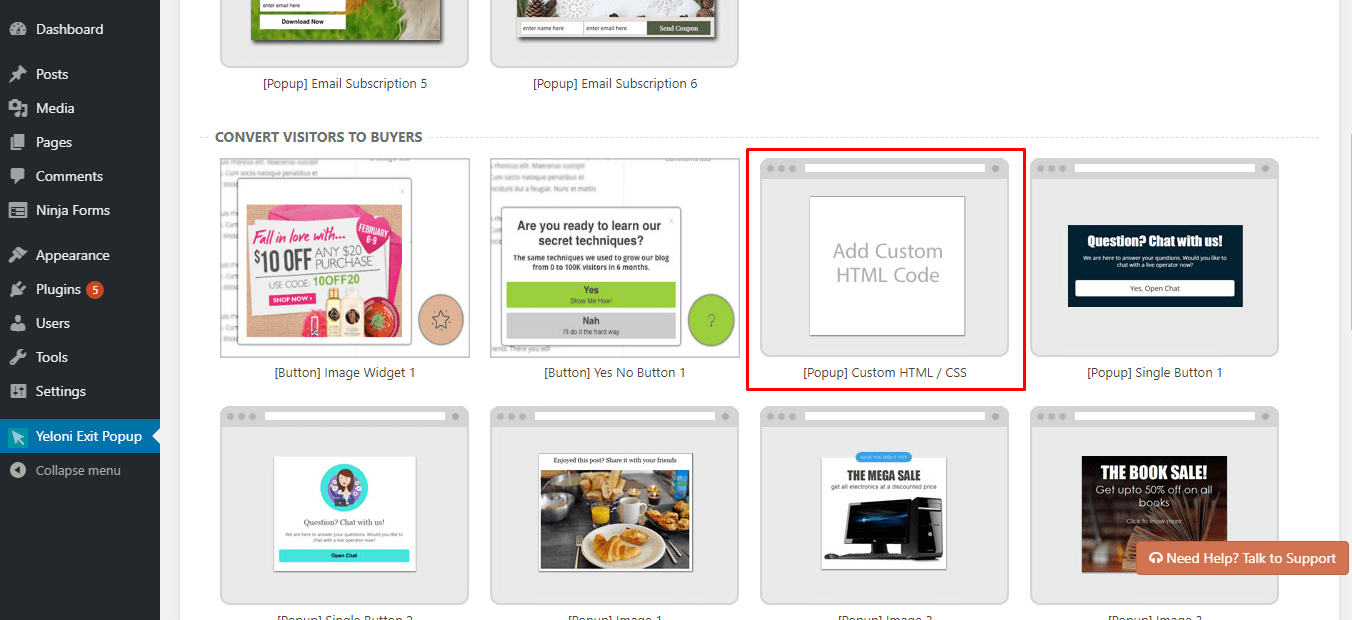
To get started, choose the Custom HTML popup template while creating a new widget.
A design screen is shown as in the image above. The left white square represents the actual popup (your canvas). All the changes made to this popup are reflected in real time. The right pane has configuration options that we will learn about below.
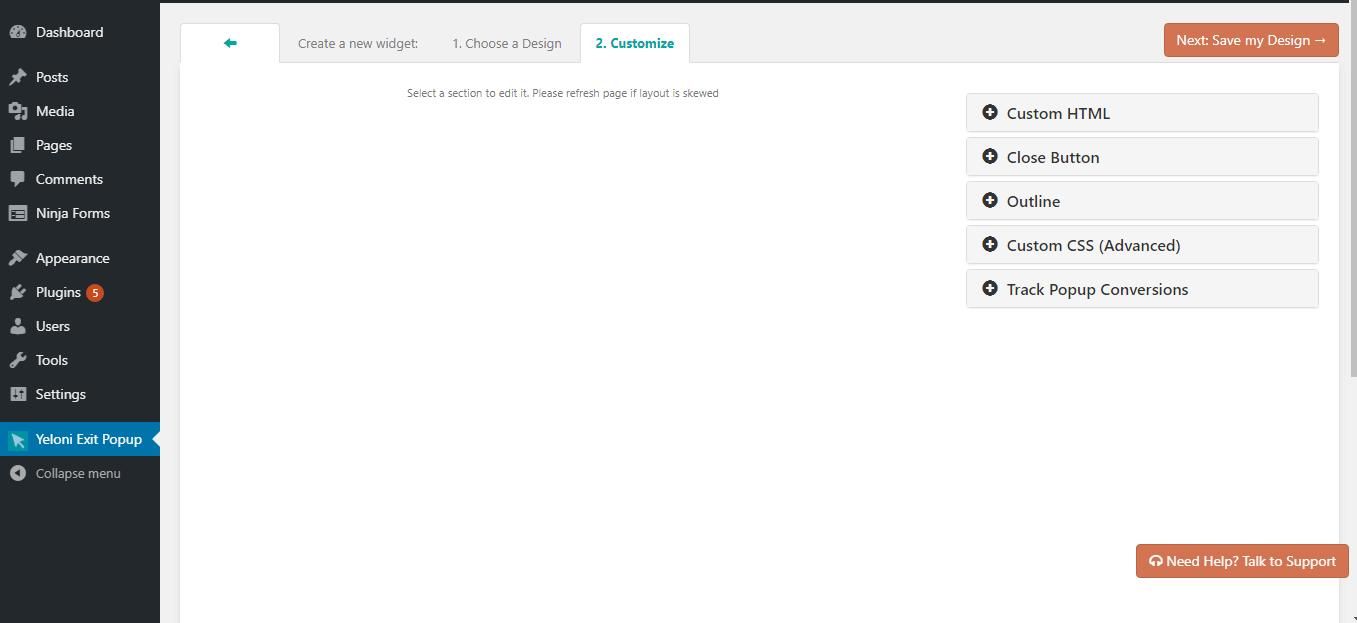
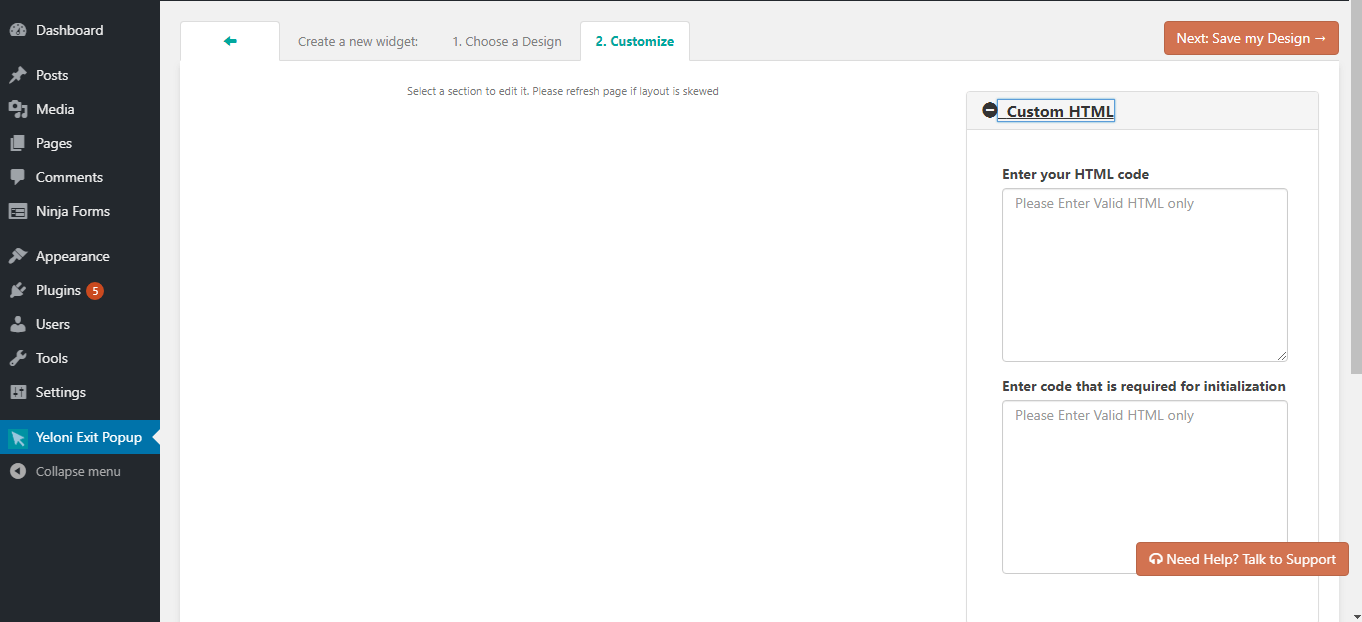
The Custom HTML section is where you enter your code. Use the first text area to enter the HTML/CSS/script code and the second, Code required to initialization to add any scripts that are to be loaded during page load.
The Close Button configuration helps you decide if you want to show a close icon on the popup or hide it.

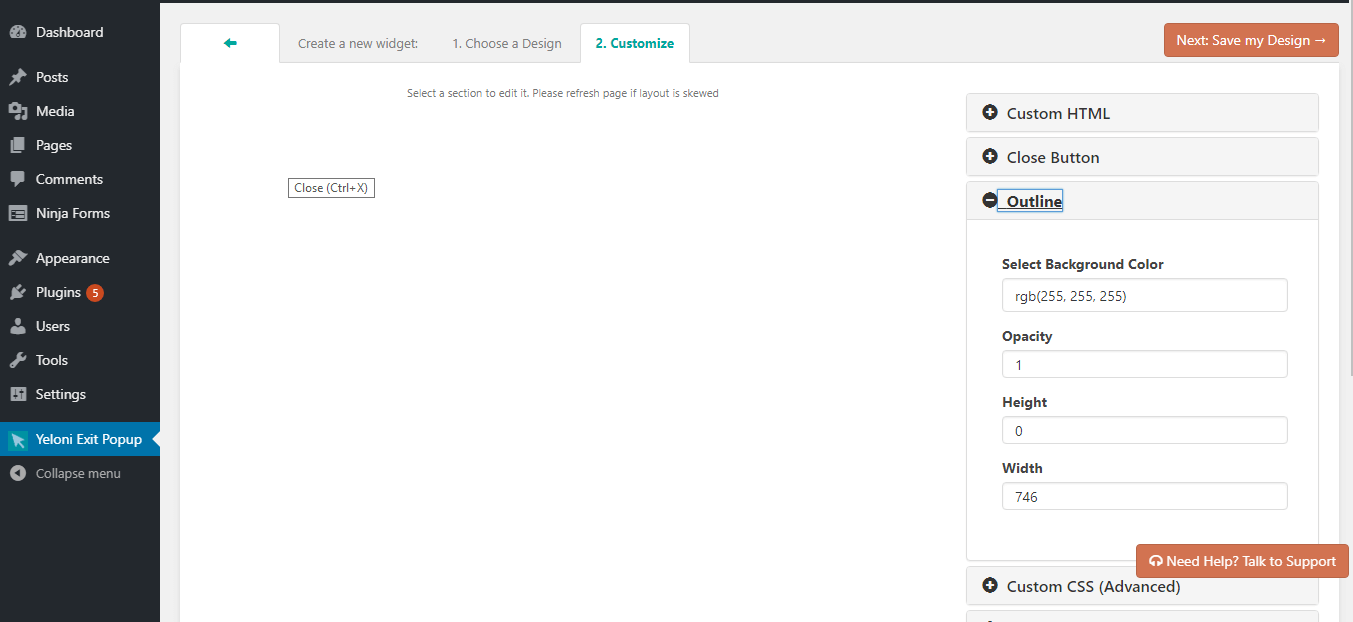
The Outline section is what defines the height, width, opacity and the background color of the widget. You can specify the height in pixels or percentages. Use this tool to find a color code that suits your needs. Please note that the color code can be in rgb() format or as a hexcode (#000000)
The Custom CSS configuration section is where you can enter any css code. Please note that you can also enter css code in the very first box as well. If you find that any styles are not being applied, there might be a case of style overlap. To fix this, please use !important beside your styles. Eg: border:1px solid black !important;
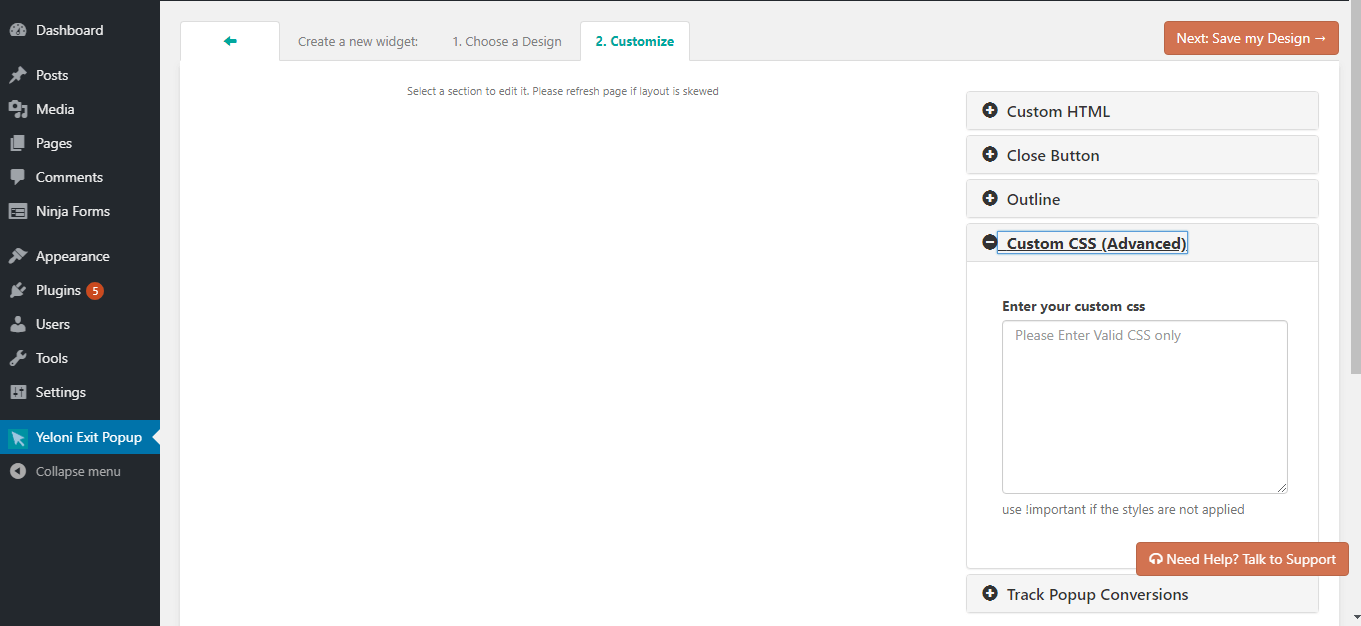
The last section Track Popup Conversions is where you can enable google analytics tracking on the popup. To use this feature, select the checkbox, enter a recognizable name of the popup and add the complete tracking code from Google Analytics.
This link explains how to get the code.
Copy paste the entire code starting from <script>….</script>
Once done, save your popup and give it a test run!
How to test it?
Open your website and give the popup a test run. If you have set it to show on exit, move your mouse towards the browser’s close button. The popup should be visible, just as per your design.
Testing Analytics:
Please note that if you have just created the popup and are testing the tracking, the events are registered under the Real-Time section in Google Analytics. They can be found under Behavior -> Events section after a day or so.
This article explains how to use and test out tracking using Google Analytics.
Some examples of awesome Yeloni popup customizations:
Queries?
Please feel free to contact us at admin@yeloni.com or ping us using the chat box below for any queries.