Your search for a free wordpress autoresponder plugin ends here. In this article, we explore Yeloni’s free email autoresponder feature that enables businesses to send a free email to their new subscribers.
Yeloni’s Wordpress Autoresponder Plugin
You’ve set up an effective lead capture widget and your visitors seem to be loving it, you can tell that much from your growing subscriber list! Next step would be to set up an email autoresponder that reaches your subscriber’s inbox. Something that works perfectly, integrates with wordpress as an autoresponder plugin and preferably free. Right?
Yeloni’s wordpress autoresponder plugin does just that – and it’s completely free to use.
Why Choose Yeloni?
There are a few alternatives to setup email autoresponders in the market today that send emails to new subscribers.
Most of these however, are free to begin with but start digging a hole in your pocket once the number of subscribers grow. Note that we mentioned – number of subscribers. In a nutshell, the business ends up paying dollars even to store the subscribers – even though it maynot be sending any emails.
For example, consider Mailchimp’s pricing:
0-1500 subscribers — Free
1500-2000 subscribers — $25/month
2000-5000 subscribers — $50/month and onwards..
plus there is a cap on the number of emails that can be sent per month. Too many restrictions. Not good for business.
With Yeloni’s Exit Popup plugin, not only can you design & install high converting signup widgets on your website but you can also send automated email responders automatically – all for free. Why use 2-3 products when just 1 does the job?
Easy to maintain and easy to measure.
Best suited for one-off emails like:
- Sending a download link for an ebook
- Sending a discounted product link
- Sending a discount code
- Or just sending a welcome email to follow up with a customer.
How to Install Yeloni’s Autoresponder Emails
Yeloni’s free autoresponder service is free with every email signup widget that you setup. Here’s how to activate and use this feature.
Start with downloading Yeloni Exit Popup plugin from here and follow the steps below to setup and email signup widget and the autoresponder service.
If you are already using Yeloni, update the plugin by navigating to:
WordPress dashboard –> Plugins –> Yeloni Exit Popup –> Update
How to Configure
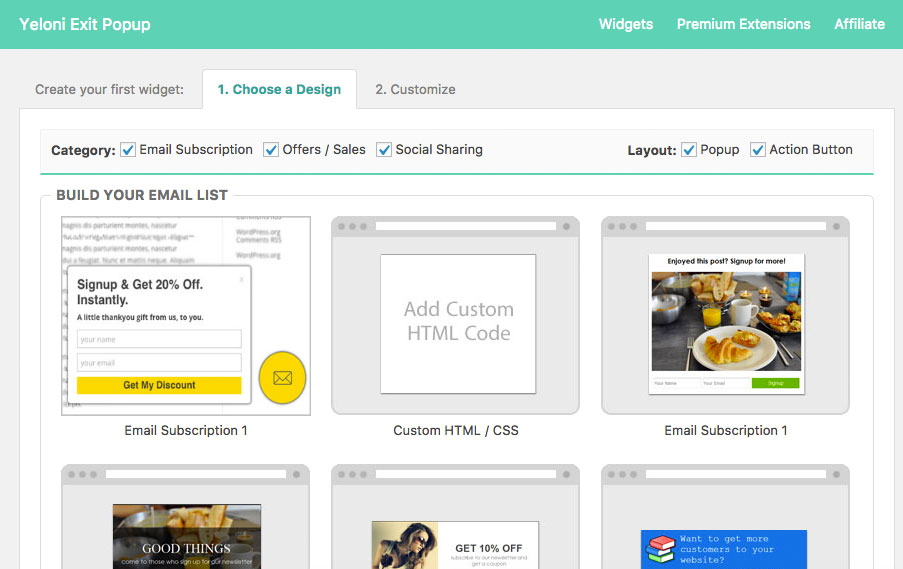
Install Yeloni Exit Popup wordpress plugin and create a new widget.
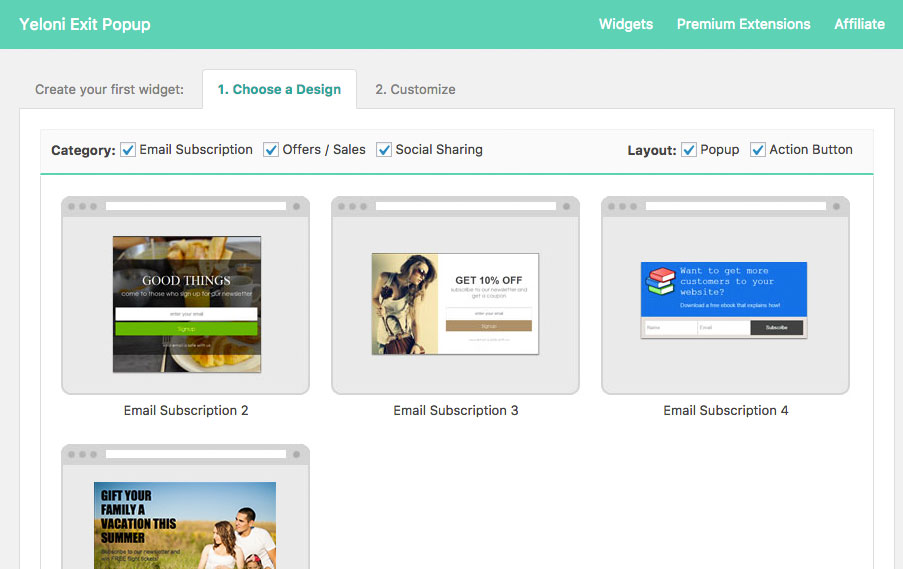
Choose from any of the email signup form templates.
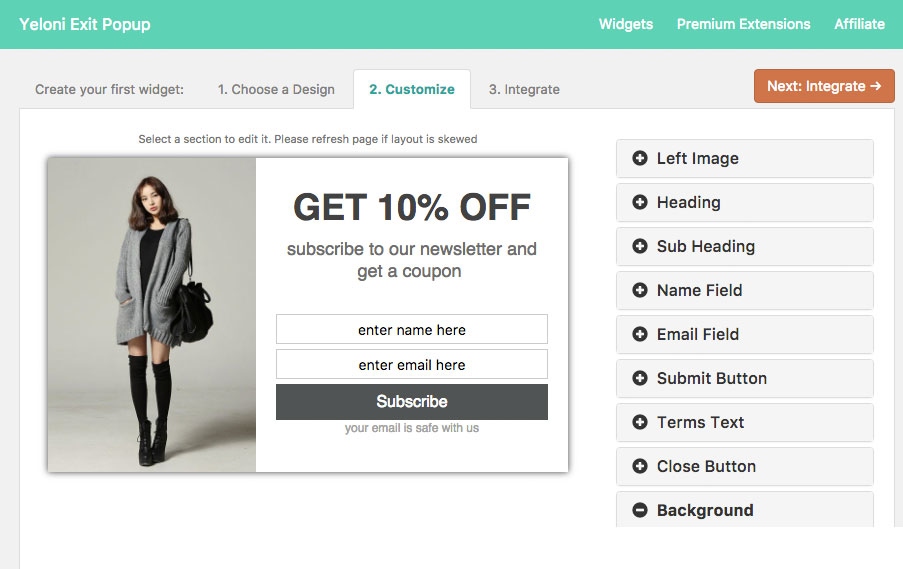
In the ‘design’ screen, customize the widget to match your business website. This is a real-time editor that enables you to see changes as soon as you make them.
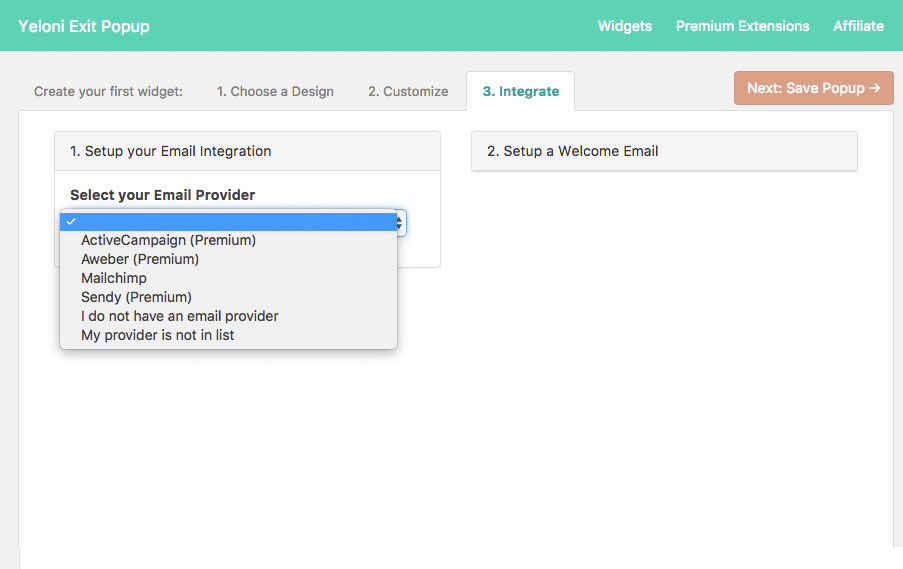 In the ‘integrate’ screen, you can choose your email provider from the drop down box. If your email provider is not listed here, please drop us an email on admin@yeloni.com and we will build an integration. Meanwhile, choose the ‘I don’t have an email provider’ option.
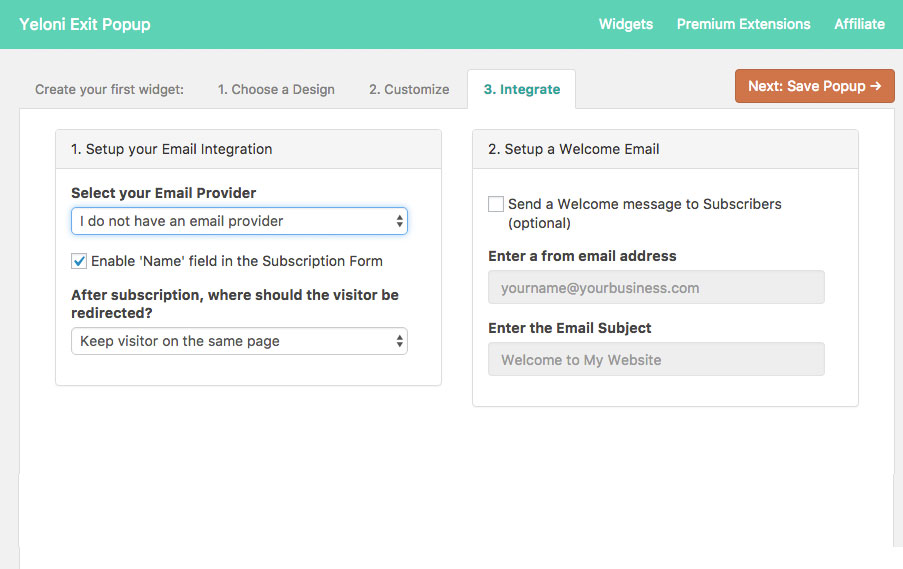
A few more options are shown. You can choose if you’d like to show the ‘name’ text field and also specify where the user is taken after subscription.
Use the ‘Setup a Welcome Email’ section to configure your email autoresponder. Click on the checkbox ‘Send a welcome message to subscribers’

Proceed with setting the ‘from’ email and email subject line along with the email content. Use [name] to refer to the subscriber’s name in the email body. Once done, save the widget.

In this example, we had configured a popup. Here’s how it looks on the website. Let’s signup and test it out!
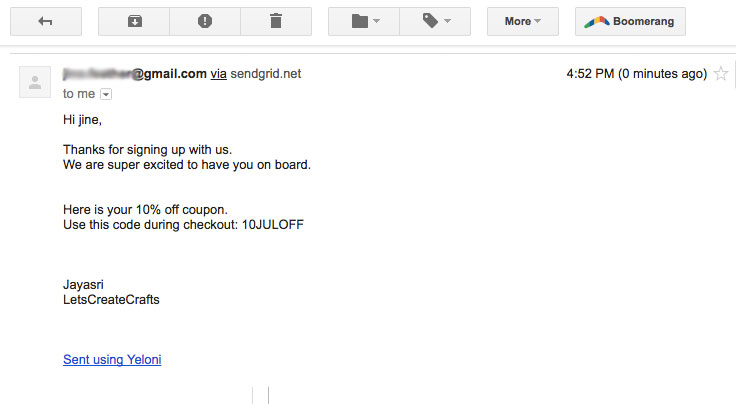
Immediately after the signup, we get an email like this in our email inbox. Note that the [name] was replaced by the subscriber’s name, which was Jine in this case.
What’s Next
Looking for some autoresponder email templates? Click here for a composition top 10 autoresponders that you can send to your new subscribers.
Queries
Please feel free to drop us an email here or ping us using the chat box below.

