Adding MailChimp to your wordpress website should be easy, isn’t it?
But with so many options to choose from and adding codes into the website, it dosen’t seem so.
Relax!
Here is an easy method to add Mailchimp to WordPress using a simple plugin – Yeloni.
Every day, small business owners across the globe send more than 1 Billion emails using MailChimp. The plans are affordable and the prices grow as the business grows. MailChimp also gives out easy to understand, actionable reports, and since Mailchimp WordPress Plugin integration is now so easy, the former has become an almost obvious choice for many folks.
It is no wonder that many business owners choose MailChimp when they first start out. We were one of them too and I suppose you are too.
Mailchimp WordPress Plugin
Let’s see how we can easily integrate MailChimp into WordPress in an Exit Popup.
There are many reasons why Mailchimp WordPress Plugins are widely used today, especially the Exit Popups.
WordPress Exit popups are great because they convert 6 times better. Intelligent popups don’t annoy users, but gently guide the user towards the action that you want them to perform.
Quick & Easy Steps:
If you have not already, install the Yeloni Exit Popup plugin, please do! You can get the wordpress popup plugin for free here.
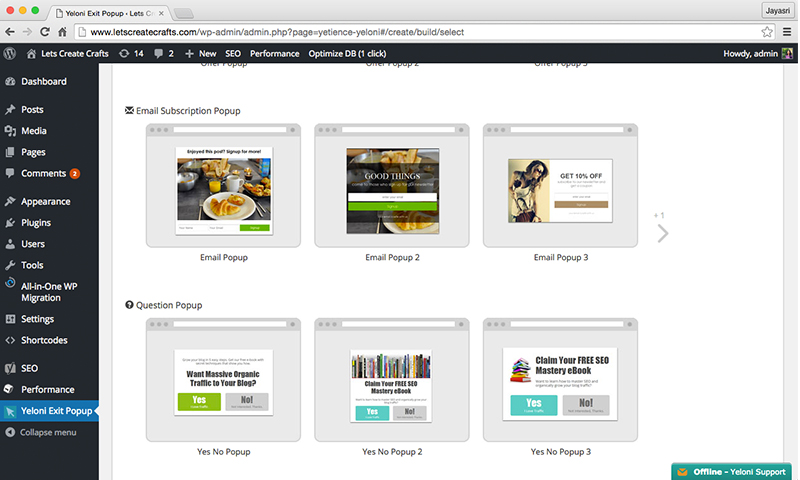
Once you open the plugin settings page, you will see a list of popup designs. Scroll a little and there are four ‘Email Popups’ templates you can choose from.
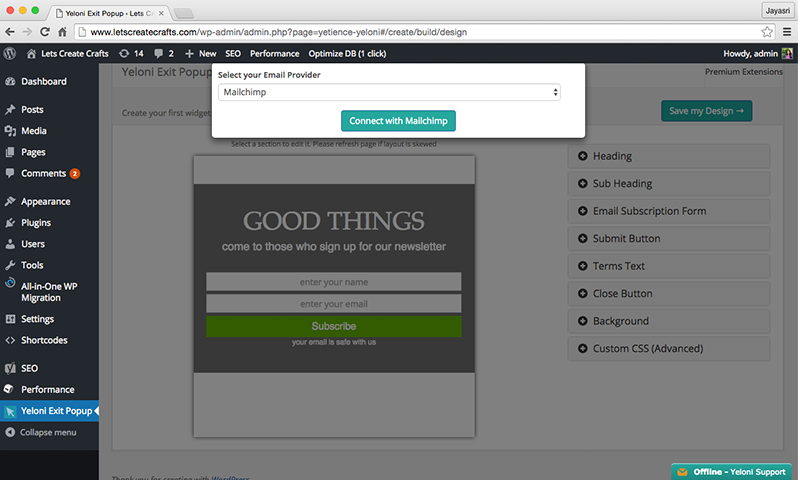
After selecting a design, you are asked for your Email Provider. Since we are using MailChimp, select the same from the drop down list. Click on the “Connect with MailChimp” button.
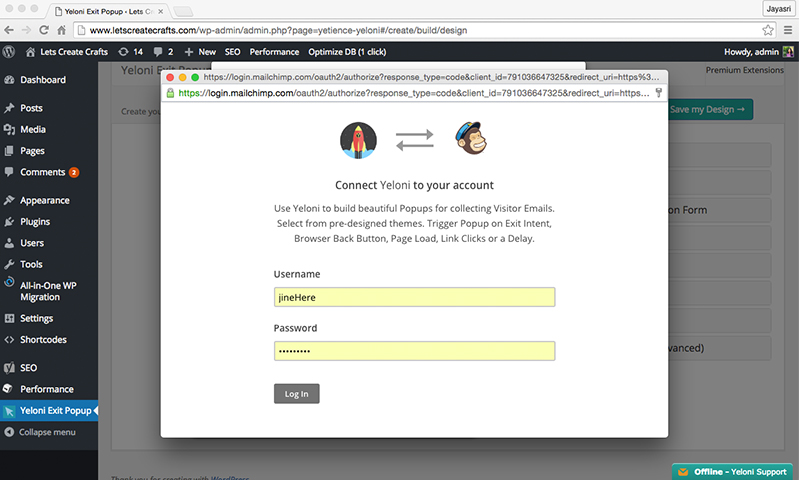
Another window opens up asking you to enter your MailChimp credentials and authenticate Yeloni app.
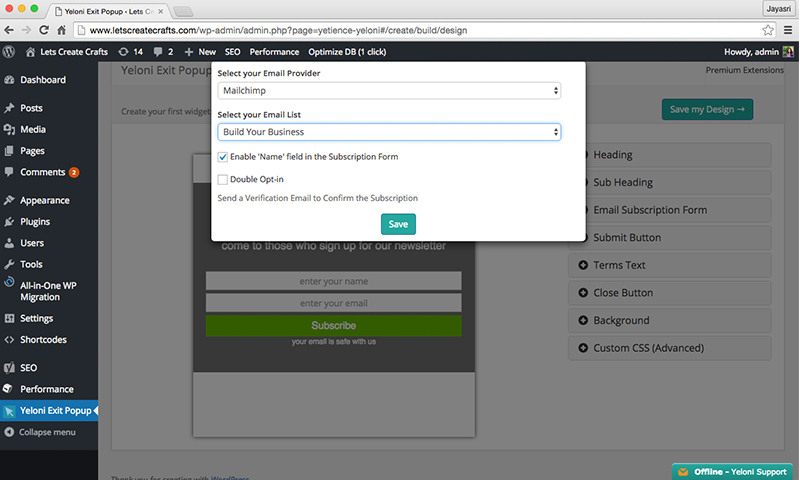
Once MailChimp is authenticated, select the list you want to store the email addresses in. Once done, you are taken to the “Popup Design” screen where you can design your popup and see the changes in real-time.
This is by far my most favorite part!
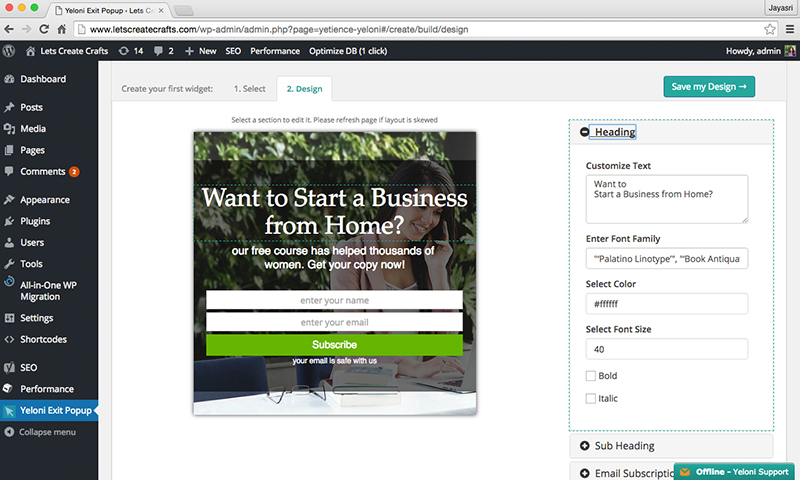
In this screen, we are editing the heading. Read this post on how to write seductive headlines.
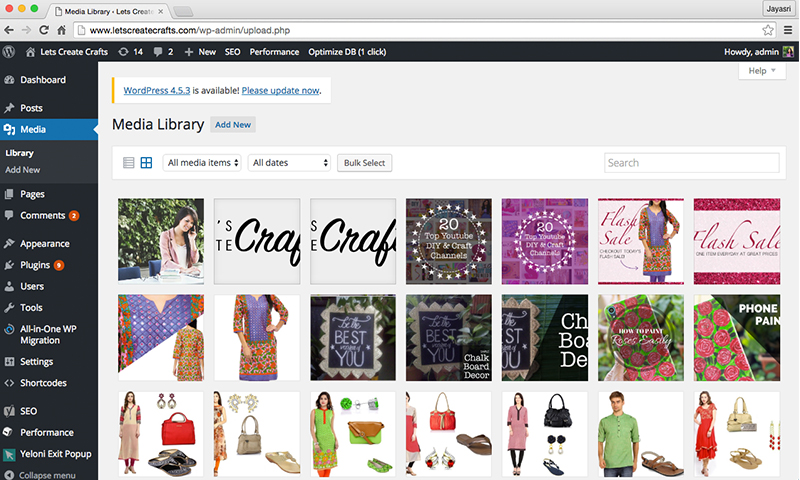
To change the background image, go to WordPress Dashboard → Media → Add New. Upload a new image and click on it.
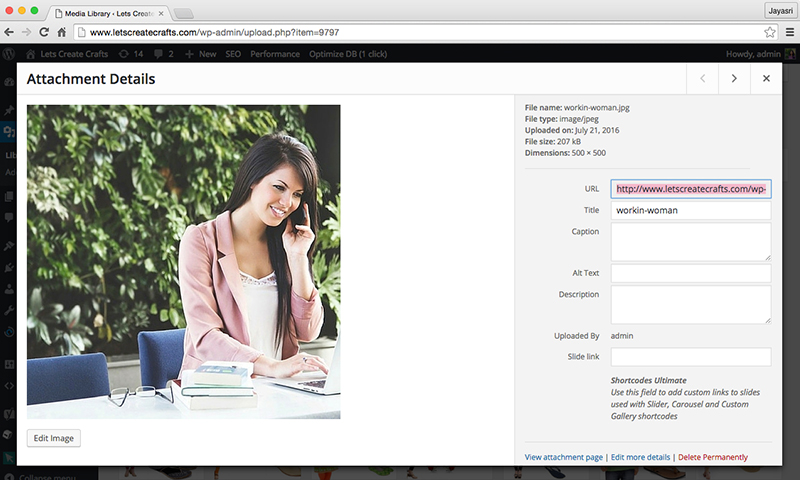
A new screen opens up with the image details. Copy the image URL.

Now on the popup design screen, under the “Background” tab, paste the image URL. You can also adjust the popup height and width accordingly.
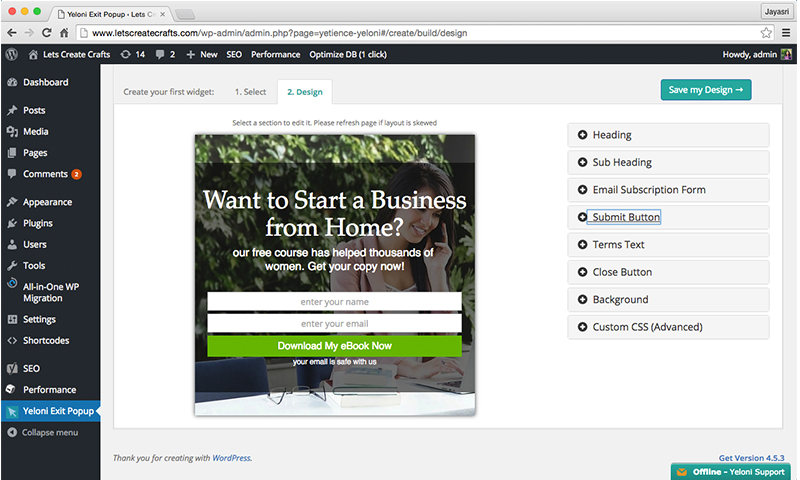
Once you are happy with the popup, click the “Save” button on the top.
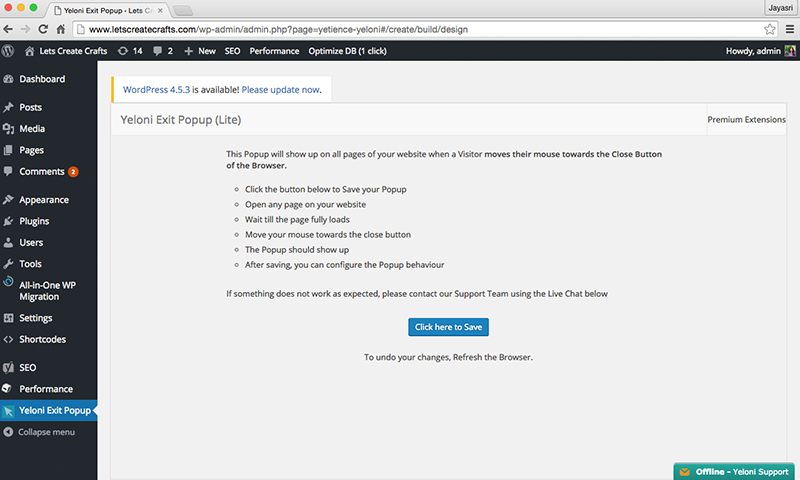
Click on the “Save” button again.
All done. Now let’s test the popup, shall we?

Looks good. But does it really integrate with MailChimp that easily? Let’s enter an email and check for ourselves!
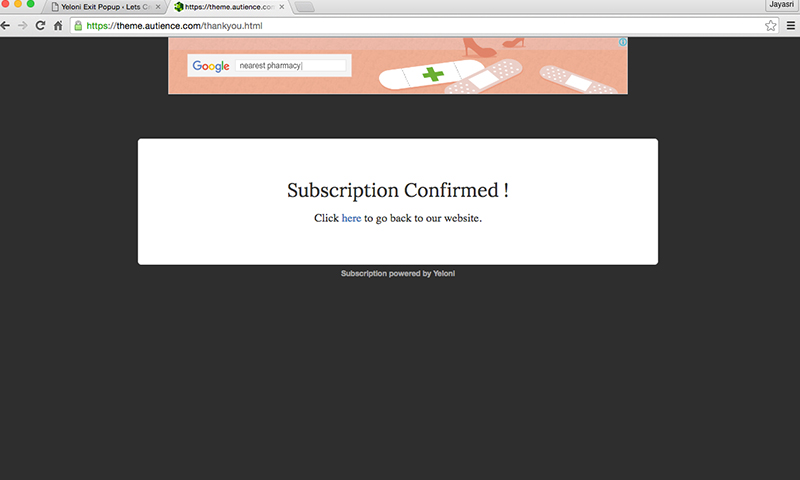
Works perfectly fine. We have been subscribed! (This is the thank you page that can be customized / skipped in the premium versions).
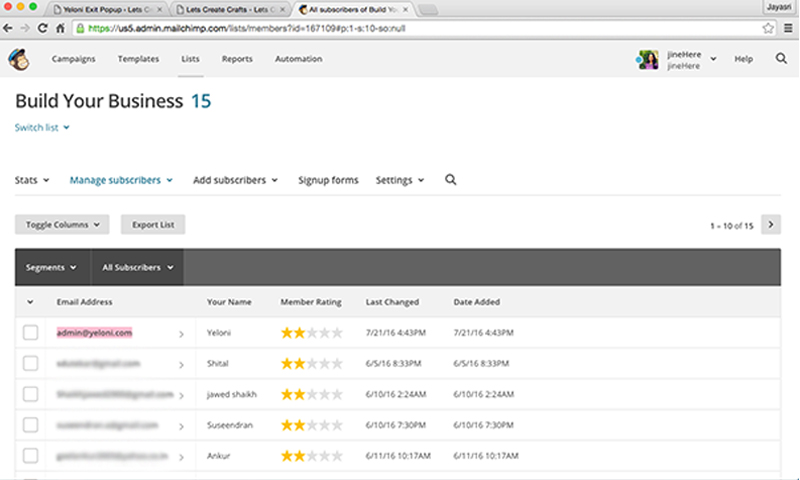
Our email is safely tucked away in our MailChimp List.
That’s all folks!
This is how to easily integrate MailChimp with WordPress for Free using Yeloni.
Note: Please note that only the email field must be marked as ‘required’ in your MailChimp list settings.
But hey, we are not done yet.
Read how you can perform A/B Tests on this popup, tweak it to increase conversions. (post coming super soon!)
Oh, and if you are short on engaging emails ideas to send to your list, we’ve got you covered. Read them here.
Now it’s your turn. Did this guide help you easily integrate Mailchimp into WordPress? Tell us in the comments below.

